Is the Carda Heads up Display worth it?
- info422346
- Jul 17, 2022
- 8 min read
Updated: Aug 5, 2022

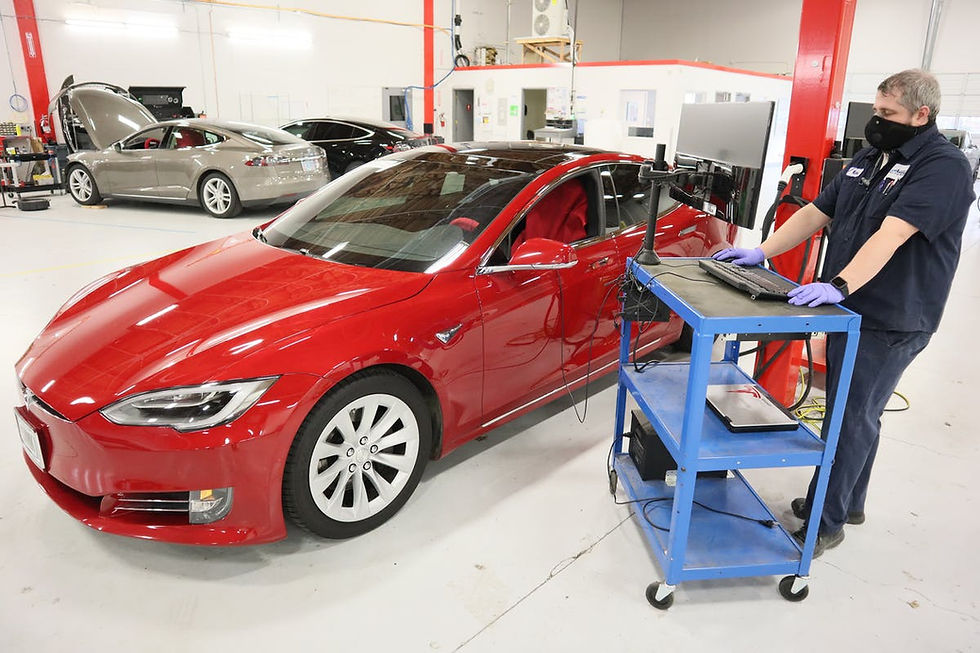
In this blog, I will be talking about Installing CARDA Heads-up Display on our customer’s new Tesla Model Y, and our first impressions. I’ve had a lot of fun working on this car so I hope you, my dear reader, will find this blog helpful.
Tools needed
Pry Tools
Allen wrench
Flat screwdriver

Time to install: Approx. 2 hours
Unboxing
I began with a quick unboxing to ensure that everything was as advertised. It felt good to open the box and see that it appeared to be exactly what it looked like online. That’s a piece of great news. In the box, you will find not only the head unit but also, instructions, a wire harness, and some rudimentary tools. The quality of the tools was sub-par so I ended up using my own but there is no reason you couldn’t complete the task with the provided tools.

Process
Powering Down
After checking our Carda HUD, we now proceed to the first step of the process, which is to completely turn off the Tesla. Start by manually turning off the ventilation/air conditioner. Next, perform a soft shutdown by tapping on the “Car Controls” button on the bottom left of the center display. Choose “Safety” from the menu, and after waiting at least 30 seconds, tap “Power Off”. Once you’ve done a soft power down, go to the back seat and remove it by pulling up hard on the seat bench. If it doesn’t come up easily, there may be some locking tabs holding the bench down. The tabs are located where the bench and the carpet meet. There are two tabs. Slide each tab to the center of the car to release the seat bench. Next, unplug the high-voltage contact connector by pinching the tab and pushing the clip all the way down then pulling the connector up. It’s a bit of a complicated procedure but wiggling everything back and forth, up and down, will reveal the direction of the locking arm to release the connector.

Finally, and this step is up for debate, remove the negative terminal on the 12-Volt battery located in the Frunk. I honestly did not do this step, and everything turned out fine, but I have also done this job where I did remove the battery terminal just to be safe. Comment below on why one should or should not disconnect the 12 Volt battery?
Removing the Dash
Start by removing the trim piece in the door jam that is at the same height as the dash.

Then remove the trim panel that bookends the dash itself, as picture below.

The dash has an end cap that may or may not need to be removed. Comment below and let me know if this was necessary for you? Popping off the end caps requires quite a bit of force and the provided pry tool did not seem up to the challenge. Using my own plastic pry tool made the job a lot easier. I popped off the passenger side first and then the driver's side.

I started pulling up the dashboard cover on the passenger side and then pulled up on the dashboard on the driver side to fully remove the dash cover.

Removing the steering column cover
Once the dash cover is removed, one can access the steering column fasteners. On the top side of the column, there are 2 push-rivets holding on a shroud of fake leather that allows for flexing when adjusting the steering column depth. Start popping off the two little rivets with an appropriate pry tool.

On the underside of the steering column, a center hole allows for access to a screw that secures the plastic housing. Use the provided Allen wrench to loosen the screw.

Finally, with a plastic pry tool, wedge the sharp end between the two halves of the steering column cover and twist them apart.

The leather shroud can be reused, so detach it from the top column cover and move it over to the Carda TopMount Display.
Accessing the Self - Driving Computer
Look under the glove box to find a flat panel that hides the electronics. Four (4) push-rivets secure the panel. Once popped off, pull down the panel slowly as there are a couple of short electrical wires that need to be disconnected. The first wire clip is for a light and the second wire clip is for a chime speaker.

Next, you will need to remove the kick panel. Start with the upper trim piece at the end of the dash in the door jam. Behind that is a push rivet that holds the kick-panel in place. Remove the rivet and start pulling aggressively on the kick panel. It is a single piece from the passenger footwell all the way along the bottom of the door sill to the center of the door. Just keep pulling up and away with firm upward force to release the friction pins.

Now you can fully roll back the carpet to reach the self driving computer box. On the right side of the box are three molex power connectors. Only now, will you see that life is about to get infinitely more difficult. This step is why 90% of customers outsource installing the Dash Display to a professional. It takes not only small hands to reach the connectors, but also the ability to contort your arm into unnatural positions while standing on your head. And while the blood pools in your head as your heart works double time to pump blood to your feet, you will begin to question your life choices and curse the engineer that designed the Self-Driving computer with the plugs on the right side, instead of on the bottom where they would be easily accessible.
Of these three connectors, it’s the middle connector, the gray one that needs to be removed. For me, it was easier to access it by removing the lower connector, the white one, first just to get at the gray connector.

Removing each connector with just one hand is challenging. You have to squeeze the connector release and pull at the same time. It seems impossible as I can barely get a single finger on the connector, much less wrap my whole hand around the thing. Even with the lower white connector in plain view, it still took me a while to get it off. Moving to the second connector, I used a long flat-blade screwdriver, and it still took me three to five minutes to pop out the gray connector.
Now it is time to insert the Carda “T” adaptor. It would have been nice if the manufacturer color coordinated their adaptor to also be gray. Despite the Carda’s white color, it is physically identical to the male gray connector I just removed. After 5 minutes, I got the new connector plugged into the self driving computer. I was surprised that it took longer to get the new connector in, despite using both of my hands. Next, I plugged in the lower white connector. This was comparably much easier and I was able to do this with one hand. After that, the female end of the “T” connector (again, why is it colored white?) mated up easily with the original gray connector.
Finally, connect the Carda heads up display with the 10-pin connector.

Test Power up
Before securing the cable and buttoning up the dash, let’s see if the connections are correct, and ensure that the Carda Display is working as advertised. This is the moment of truth for many of you. First, if you opted to disconnect the 12V battery (I did not) this is the time to reconnect the negative post on the 12V battery. Next, reconnect the HV contactors by restoring the connector under the rear seat bench on the passenger side.

I placed the Carda HUD on the passenger seat beside me and I immediately stepped on the brake pedal and what do you know. IT WORKED! As soon as the HUD powered up (and I never had a doubt that it wouldn’t), I called my customer over to take a look. I had a great time showing him the results.

Let’s bring this home. All that is left to do now is run the wiring under the dash cover and restore all the panels and trim pieces to their original, locked and upright position. Before reassembling the dash cover. Use some electrical tape to secure the HUD wire to the dash. This ensures that the wire won’t vibrate around and keeps the wire from getting pinched when pushing the dash clips back in.
Programing
Once you get the dash all back together, it's time to start programming the HUD. First thing out of the gate is the default language is set to Chinese. The only other option is English. This option is on page two. Once I programmed this display to “English”, I just went down the line of options on page 2. For example the next function is to set the time zone, and then the color. For color, the Carda has an “Auto” detect color and that is the default setting. It should just use the color programmed into your car. And I’m sure that it works if your Tesla Model 3 / Model Y is Red, Black, Silver, Blue, or White. As of this writing, if you have a gray colored Tesla, then you are out of luck as that is not an option. The Carda display defaulted to red when in “Auto”. Weird! Moving back to page 1 of the programming options, in the settings, I’ve left the time format as 12 hours instead of changing to 24-hour format. I left the back-lighting as “Auto” when the other options are Day-mode, or Night-mode. I left the theme as “Simple” where the other option is “Classic” and finally, I changed the default “Model 3” to “Model Y”. Through out the programming phase, working with the scroll wheels on the steering wheel was maddingly frustrating. The Carda did not always respond as expected, and I found the UI to be clunky and not user friendly.

With that we are 100% done installing the CARDA Topmount Heads up Display. It took me just over 2 hours to complete the installation.
Review
Taking this for a test drive, I formed a strong opinion of the display right away. In a quick drive around the block with the heads-up display installed, one of the problems I found is that the angle at which one views the heads-up display through the steering wheel is not adjustable. It's fixed there on the steering column and because of that, there’s no good angle at which I viewed the display and I found it was really difficult to see the display. I tried adjusting with the steering column itself (e.g raising it up, lowering it down) but no matter what I did I could not seem to find an angle that I found pleasing for viewing for the heads-up display.

As mentioned before, the programming experience was not great, but once it is programmed, it is a set it and forget it experience.
While I know a lot of people like the clean look of not having a display at all, behind the steering wheel, others find that it is discerning. If the mission of Tesla is to convert the masses to sustainable energy alternatives, then making the user experience as seamless as possible from gas powered to electric should be considered. I would argue that getting rid of the front grill and removing the dash-display are styling “improvements” that are a leap too far for the uninitiated. For those die-hard internal combustion engine (ICE) fans, the transition to all-electric needs to be gradual, not disruptive. In conclusion, Tesla could have captured more market share if it made behind-the-steering-wheel displays optional.
Austin EV Only, LLC
For a complete video of the installation process click here:
For those looking to purchase the CARDA Topmount heads up display, click below.


Comments